- Subject
- Microsoft 365 & SharePoint
- Filed
- Source
- matheusgiovanini
- Loans
- 384
Stuck IBM LTO-7 Cleaning Cartridge Reveals Tape Damage and a Loose Capture Mechanism
An LTO-7 drive inspection recovered a trapped cleaning cartridge but found creased tape and a loose, obstructed leader pin capture mechanism.
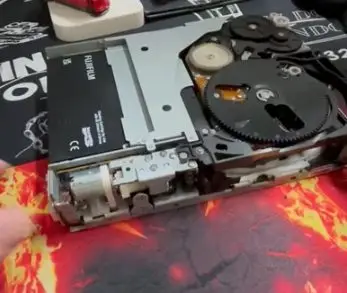
A stuck cleaning cartridge can point to a fault inside the drive, even after the cartridge is freed. In this field intervention, an IBM LTO-7 drive gave up its trapped cartridge after hands-on work, but inspection also revealed visibly damaged cleaning tape and looseness in the leader pin capture mechanism. The drive was replaced because extraction alone didn’t establish that it could handle media reliably.
The drive was already outside its manufacturer’s support coverage. This account describes one field experience for educational purposes; it isn’t a repair procedure. Internal servicing can cause further damage and requires qualified personnel working from documentation for the exact equipment. For a drive still under warranty or support, contact the manufacturer or an authorized service provider rather than opening it yourself.
Following the mechanism behind the jam
The cleaning cartridge remained seated in the drive when the intervention began. After removing the drive from the tape library, I exposed the mechanism to inspect the tape path and the parts involved in loading and unloading. The work connected earlier exploration of an IBM LTO-6 mechanism with a practical fault in a different generation, the LTO-7.
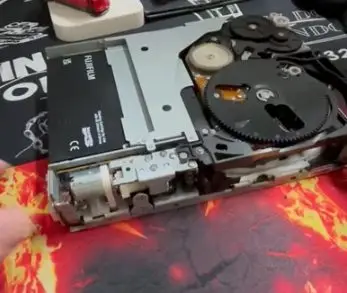
The cleaning cartridge remained seated beside the exposed mechanism.
A cleaning cartridge relies on the same loading, threading and unloading functions as other tape media. If the drive can’t return those parts to the right positions, the cleaning cartridge may remain trapped along with its tape engaged in the mechanism.
To get a clearer view, I removed a guide after taking out its fasteners. That provided access to the tape and nearby moving parts. It also made it easier to see how the cartridge’s retained state related to the path the drive uses to move tape.
What manual movement showed
With the mechanism exposed, I turned the gears by hand and watched the large black assembly change position. That movement helped trace how the connected parts interact. During normal LTO operation, the drive captures the leader pin attached to the tape and guides the tape through the internal path toward the take-up reel. The cartridge shell can remain accessible while the tape is engaged inside the drive; normal unloading requires the tape and threading assembly to return to the proper state.
The hand movement shown here was part of work on a faulty drive. It illustrates how the parts are connected, rather than demonstrating a powered loading cycle or a procedure for servicing other equipment. I also manually rewound the mechanism through an access point on the underside of the drive as I worked toward recovering the cartridge.
Visible damage and a mechanical fault
Inspection revealed that the cleaning tape was folded and crumpled inside the mechanism. Its creases and deformation were directly visible. Removing the cartridge wouldn’t undo that damage, so I wouldn’t treat successful extraction as a reason to reuse visibly damaged cleaning media in another drive.
The condition of the tape and the condition of the mechanism were two separate findings. Seeing both didn’t establish which one came first; determining that would require more evidence. That distinction matters when assessing a failure: the damaged tape is observable, while the original cause of the problem remained unresolved.
I also found noticeable looseness in the component that captures the cartridge’s leader pin. The component had play and was catching on the guides. That interference changed the assessment of the drive. Even if I could free the cartridge, the capture mechanism still presented a mechanical defect that could affect media handling.
Extraction didn’t restore the drive
After further manual work with the cartridge still seated, I was able to withdraw it. The immediate retention problem was resolved, but the looseness and guide interference remained. I therefore replaced the drive. The inspection gave a reason to take it out of service; it didn’t establish why the capture component had become loose.
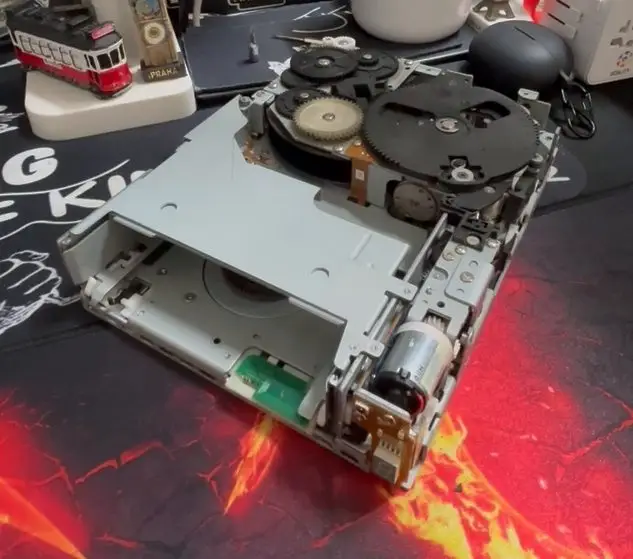
The drive assembly after the cleaning cartridge was removed.
Cartridge removal by itself doesn’t show that a replacement drive is ready for production use. Acceptance is a separate step that involves the relevant diagnostics, loading and unloading checks, and backup and restore testing. Teams should treat those checks as distinct from the work needed to recover media from a failed mechanism.
Keep cleaning management separate from repair
Routine cleaning also has a software and library management side. Veeam’s documentation on automated drive cleaning describes how Veeam can manage cleaning for library drives. When Veeam manages cleaning, the documentation says to disable cleaning tasks on the library. The feature isn’t available for standalone tape drives.
Those settings can help coordinate routine cleaning, but they don’t address a damaged mechanical component. Here, the key operational lesson was the gap between the initial request and the final decision: the task was to recover a cleaning cartridge, while inspection showed that the drive also needed replacement. When a cartridge is freed, teams still need to assess the tape and mechanism before deciding whether the drive is fit to handle media again.