- Subject
- Microsoft 365 & SharePoint
- Filed
- Source
- Christian
- Loans
- 515
Extend a Windows Server C: Drive When a Recovery Partition Blocks Disk Management
A recovery partition can prevent Windows from extending C: from nearby capacity. This walkthrough uses GParted, Hyper-V and reagentc to reclaim space.
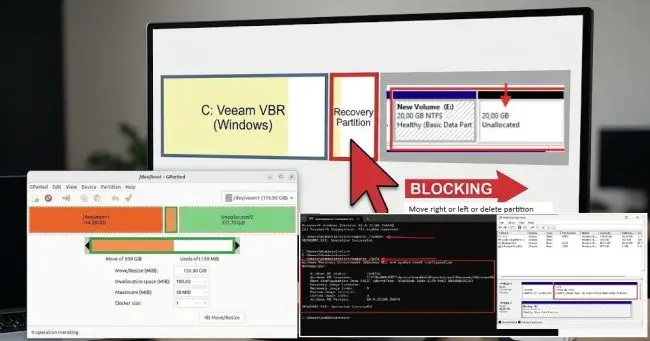
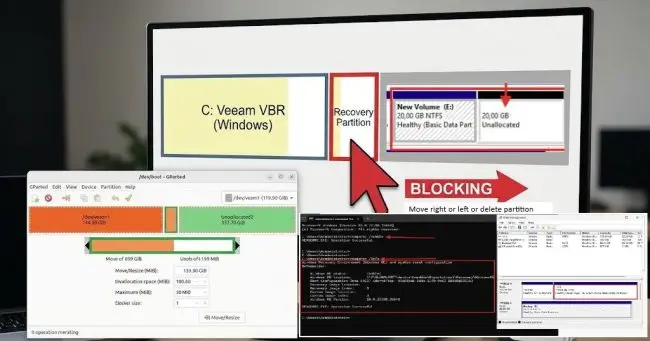
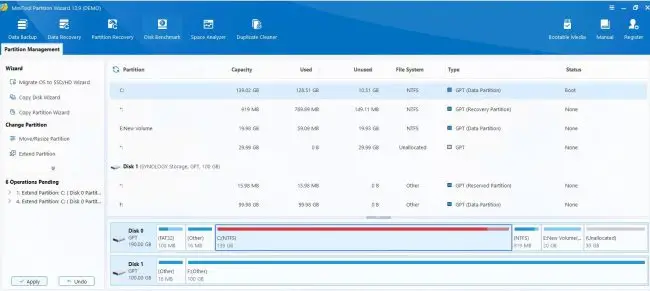
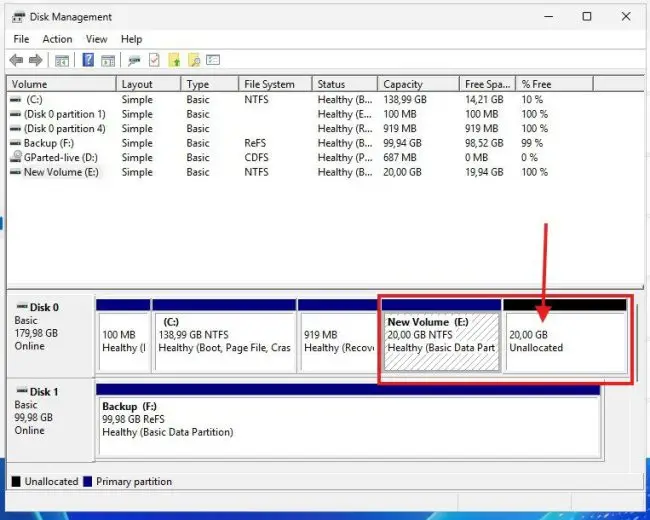
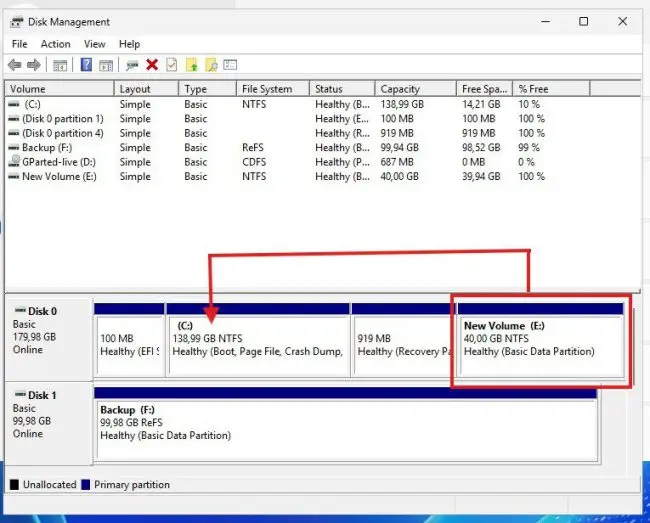
A full C: drive can block updates and maintenance tasks. In this Hyper-V example, low disk space stopped an update to Veeam Backup & Replication (VBR). The virtual disk had room to grow, and the server also had an E: volume, but a Windows Recovery partition sat between C: and E:. That layout prevented Windows Disk Management from extending C: into E:'s space.
The fix was to enlarge the virtual disk, remove the intervening Recovery partition, and then extend C:. GParted was used to delete the partition because moving it did not work in this environment. That choice has a recovery consequence: deleting the 919 MB partition disables the existing Windows Recovery Environment (WinRE) until it is enabled again. Take a checkpoint first, and treat the partition change as an operation that needs a recovery plan.
Expand the virtual disk
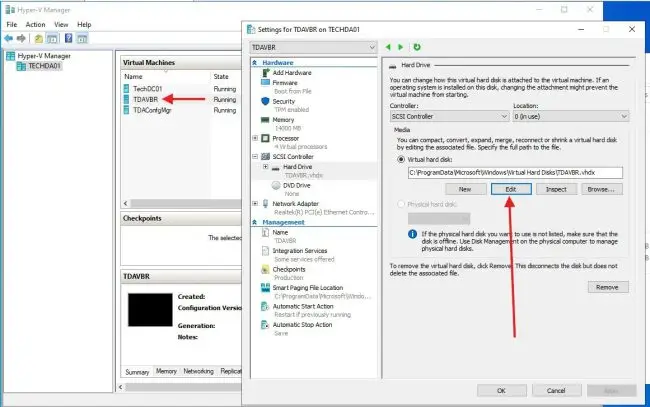
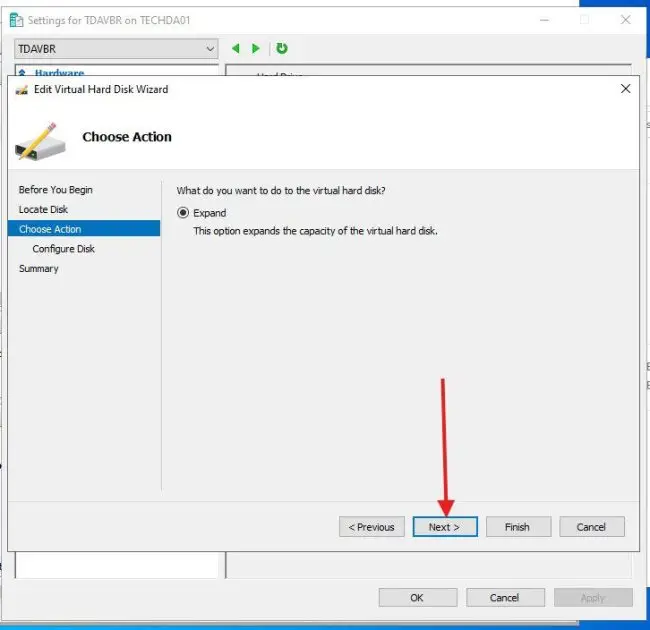
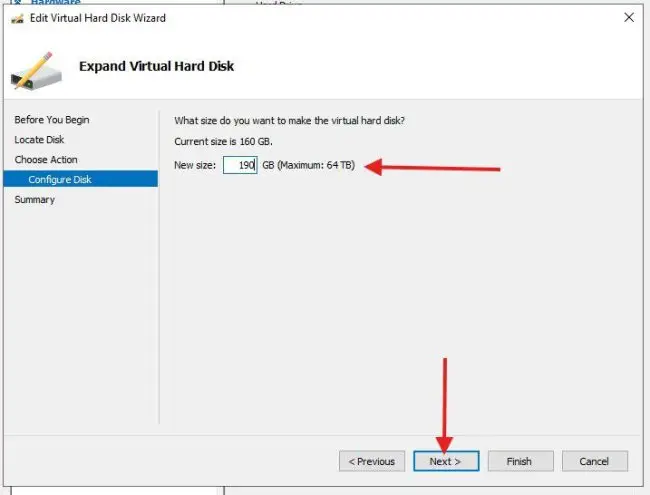
First, increase the VM's virtual hard disk capacity. In Hyper-V Manager, open the VM's settings, select its hard drive, and choose Edit. The Edit Virtual Hard Drive wizard offers the expand operation; follow it to add capacity. In this example, the disk was expanded by 180 GB. The operator initially entered 190 GB, then corrected it to 180 GB before completing the change.
The VBR server in this walkthrough runs as a Hyper-V VM, so the disk settings are accessed through Hyper-V Manager.
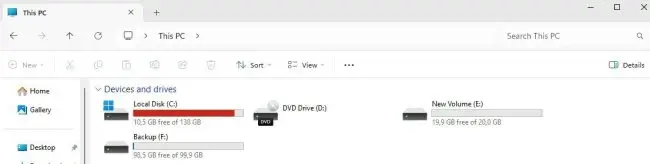
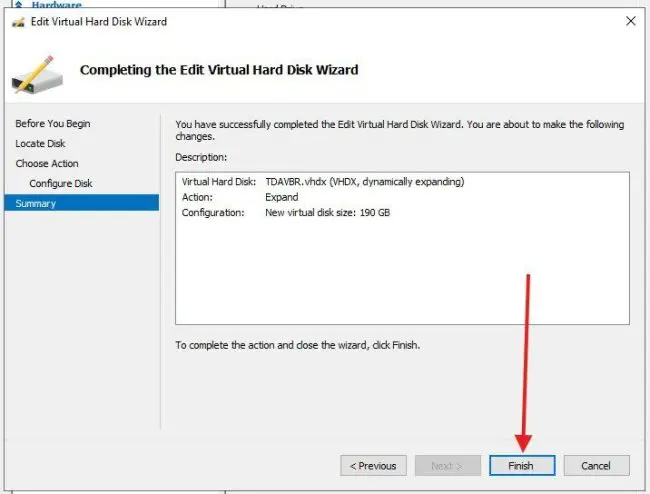
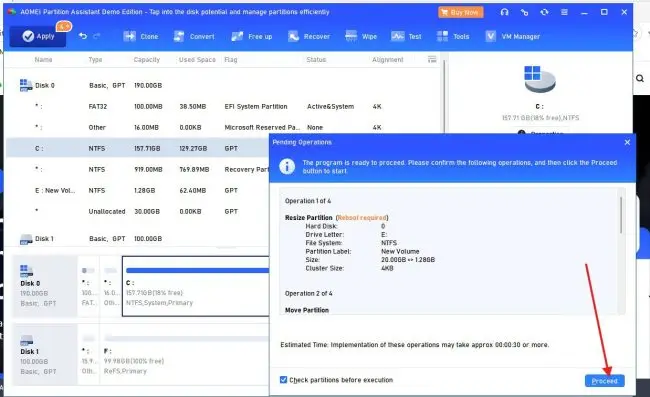
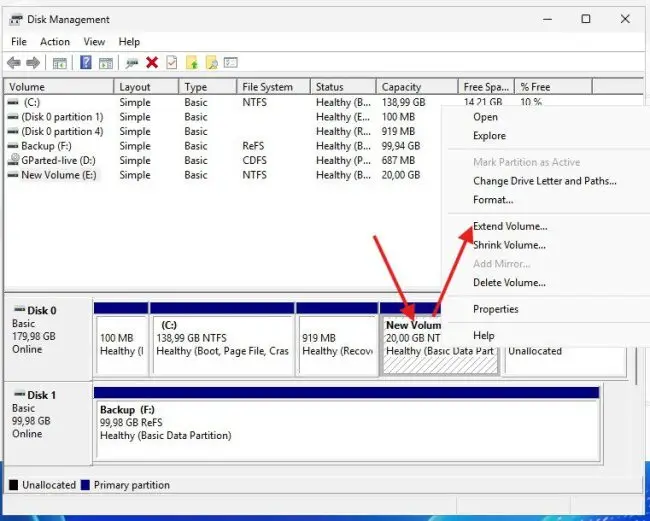
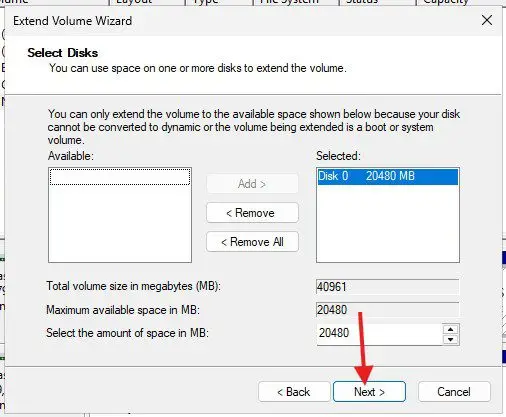
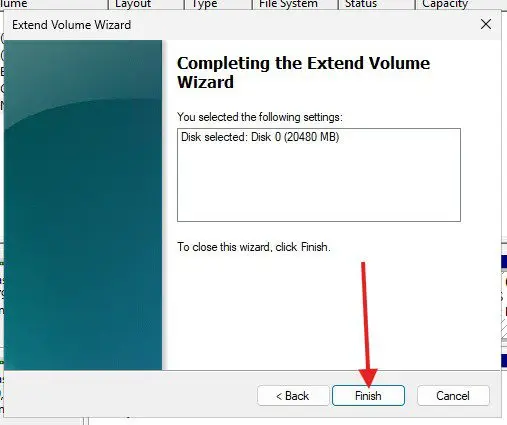
The added capacity appears as unallocated space. In the example, it was first added to E: using Disk Management's Extend Volume wizard. That made the additional space available on E:, but it did not solve the C: capacity problem: the Recovery partition still separated the two volumes, so Windows could not merge them directly.
Boot GParted in the VM
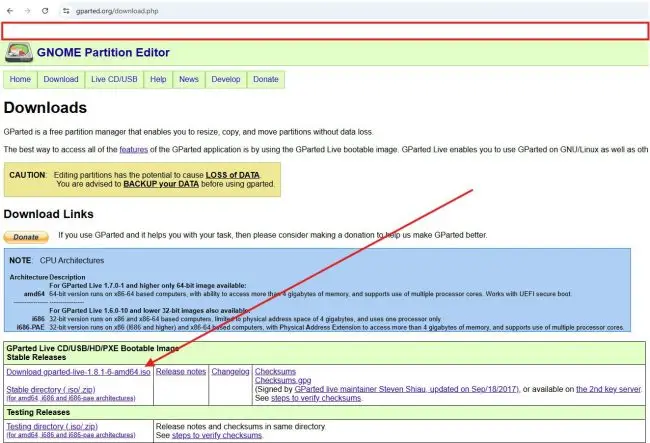
GParted can move and resize partitions, but moving the Recovery partition did not work in this case. The chosen approach was to delete it, create unallocated space next to C:, and then extend C:. Download the GParted ISO from the GParted download page. Because Windows may mark downloaded files with Mark-of-the-Web, open the ISO's properties and unblock it if Windows prevents its use.
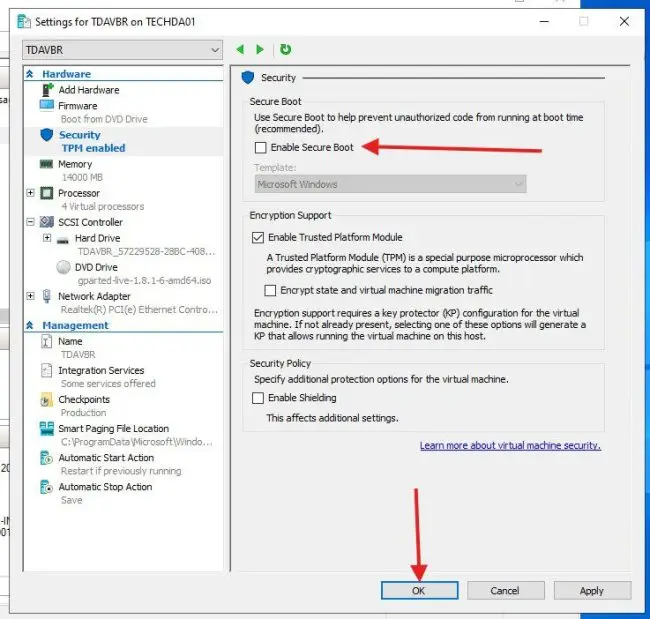
Attach the ISO to the VM's virtual DVD drive. Before changing partitions, create a Hyper-V checkpoint. A checkpoint is not a substitute for a backup, so make sure the server can be restored if the disk operation fails. In the VM firmware settings, move the DVD drive ahead of the virtual hard disk in the boot order. If GParted will not start, temporarily disable Secure Boot.
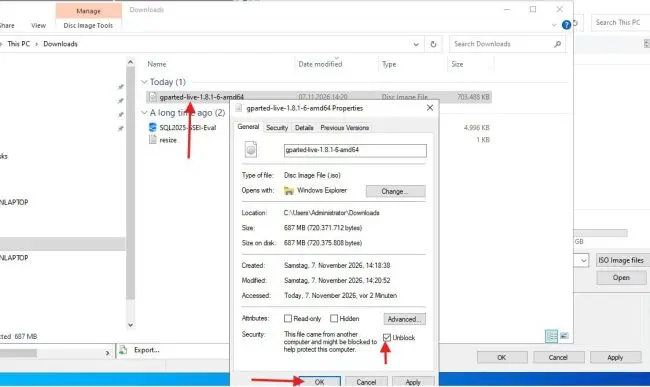
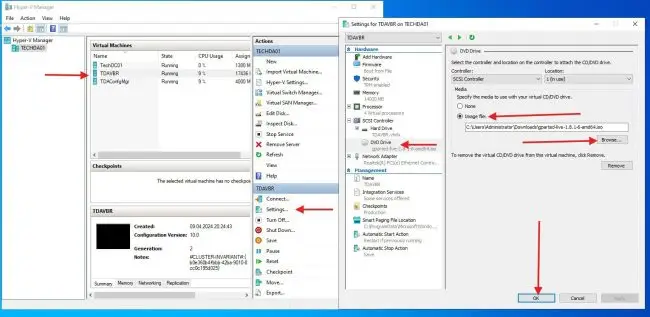
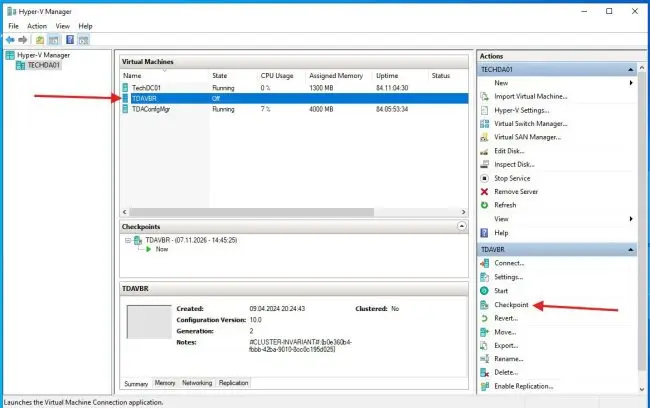
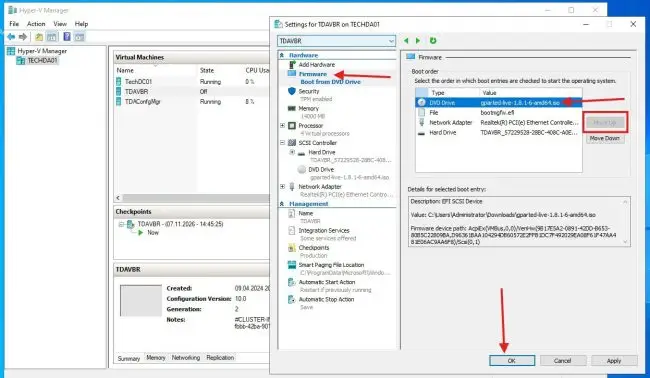
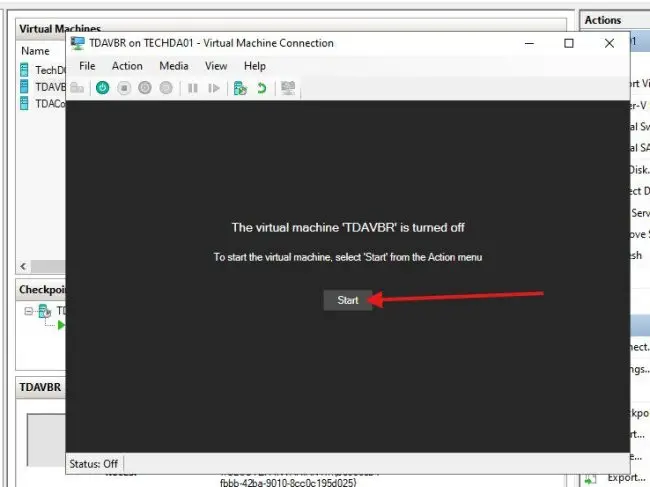
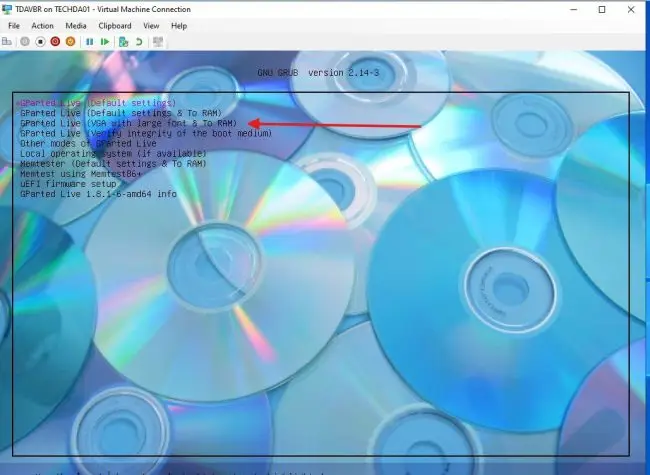
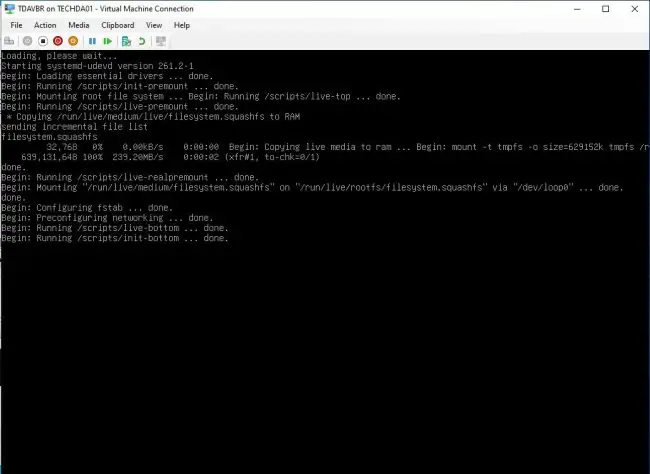
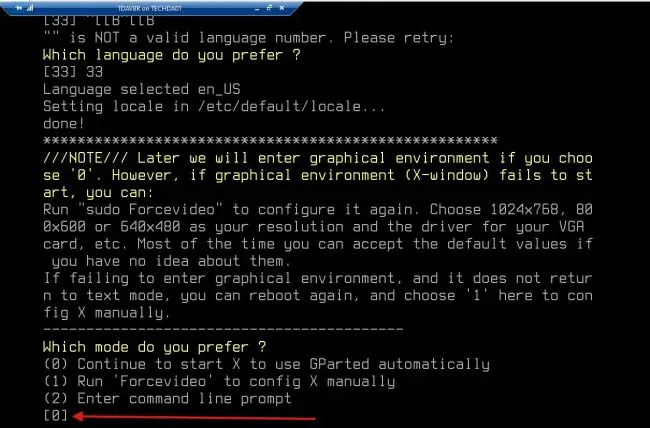
Start the VM and connect to its console. The default GParted Live boot choice stalled in this Hyper-V setup. Selecting GParted Live (VGA with large font & to RAM) allowed it to continue; other GParted Live modes may also work. Follow the startup prompts, accepting the default keymap, language and mode to load the partition editor.
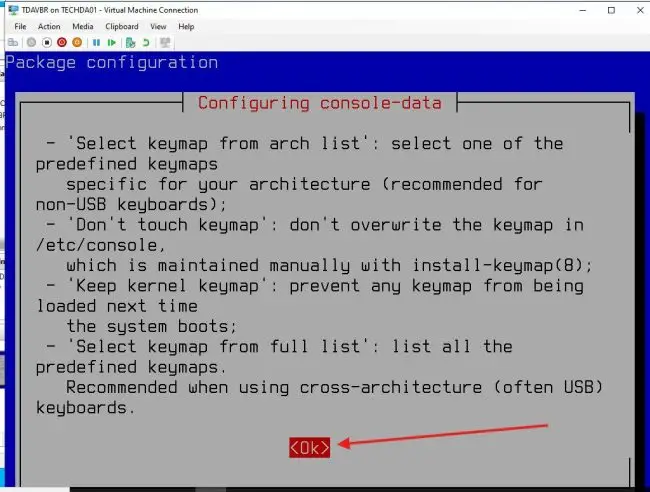
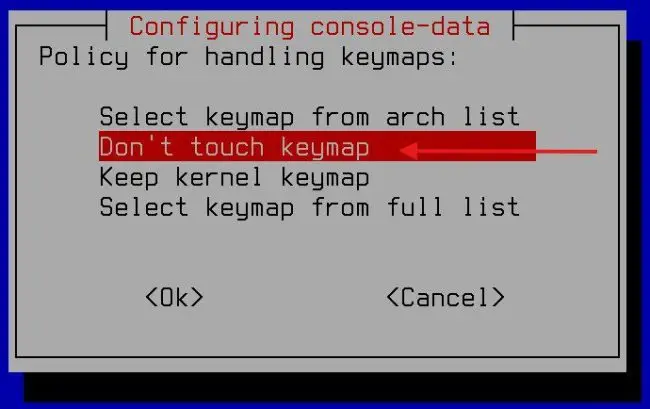
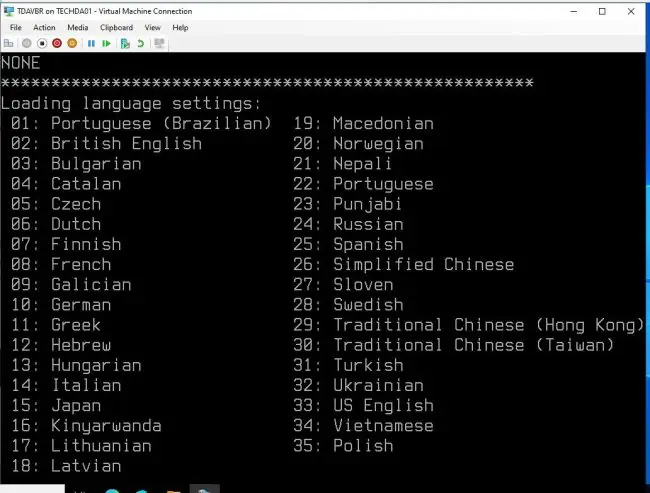
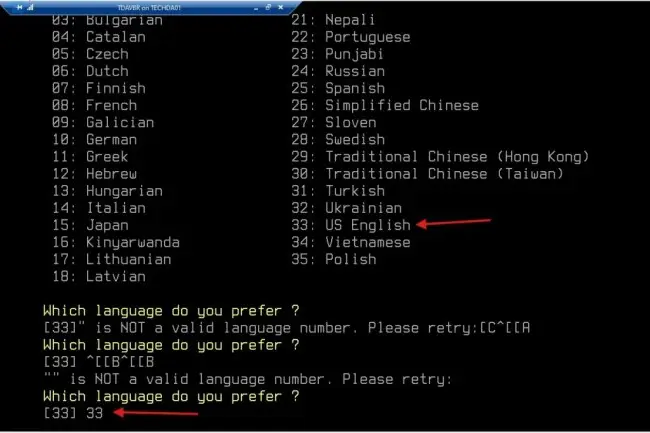
Remove the Recovery partition and extend C:
Before deleting the 919 MB Recovery partition, disable WinRE from an administrative Command Prompt so Windows can clear its recovery configuration:
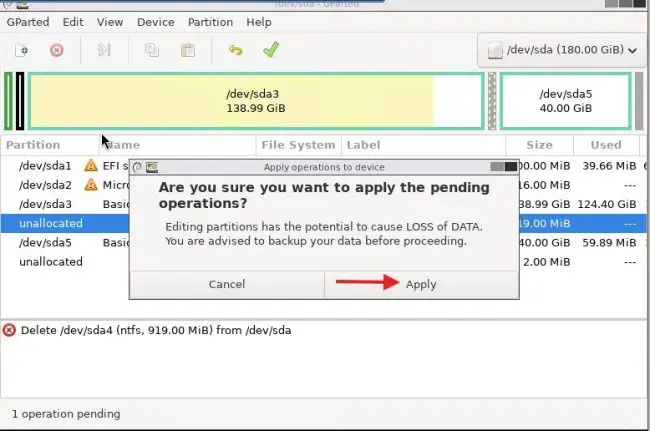
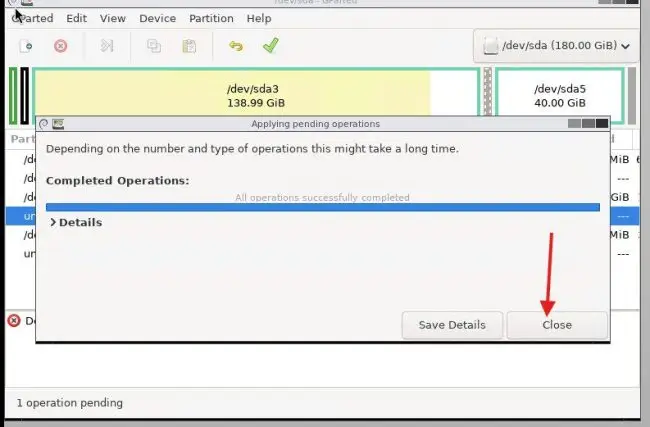
reagentc /disableIn GParted, select Disk 0 partition 4, the 919 MB Recovery partition, delete it, and apply the pending operation. This removes the existing recovery partition and its boot-time recovery tools. If GParted appears stuck after applying the change, close it and restart the boot process before continuing.
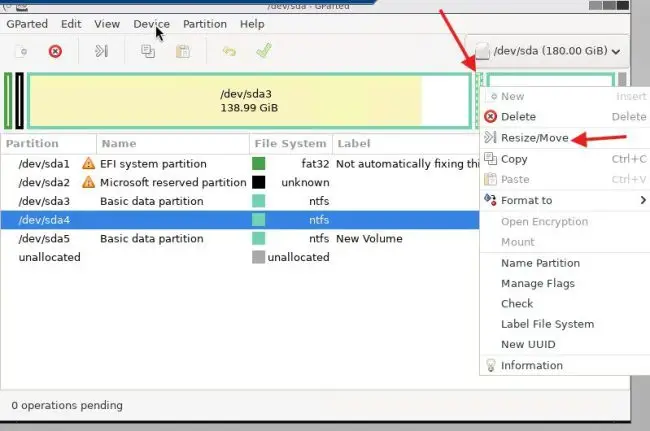
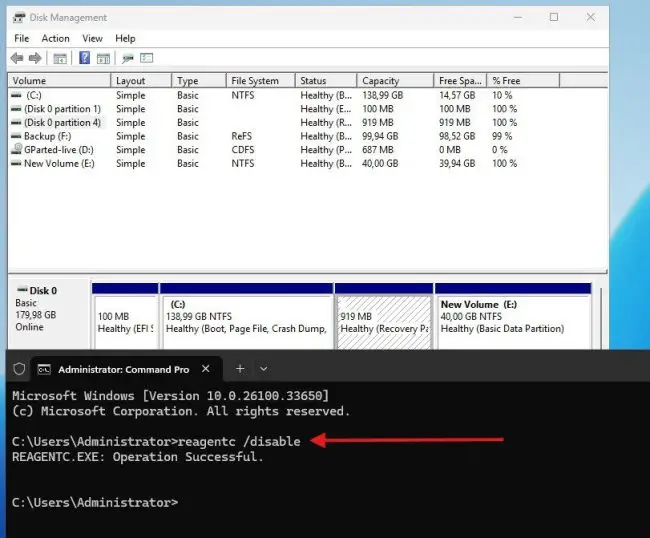
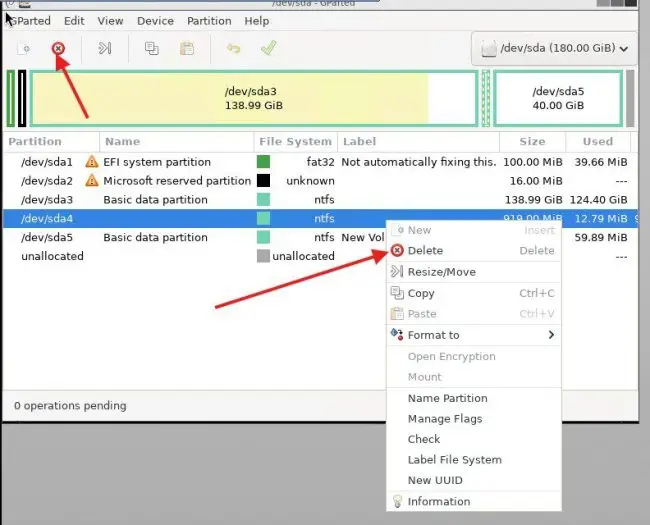
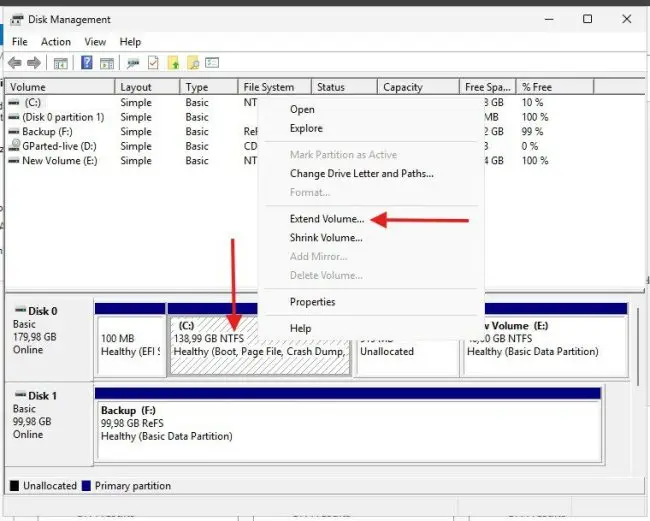
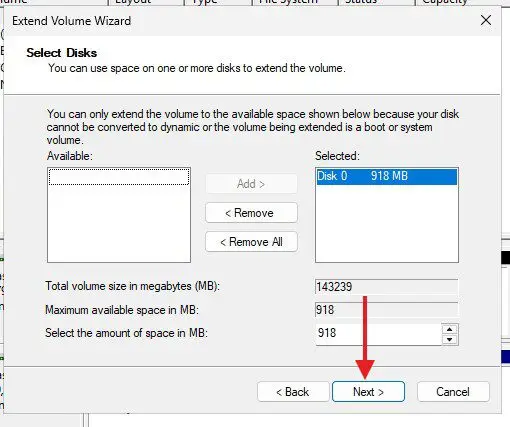
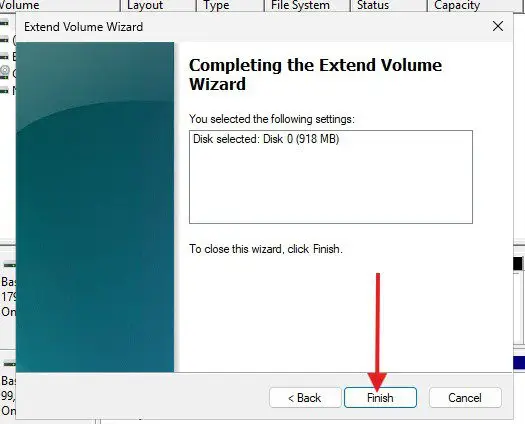
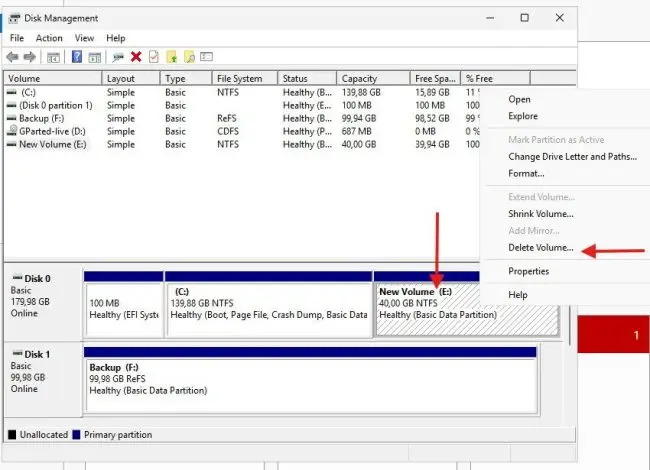
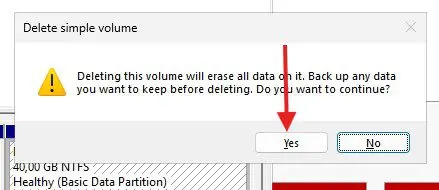
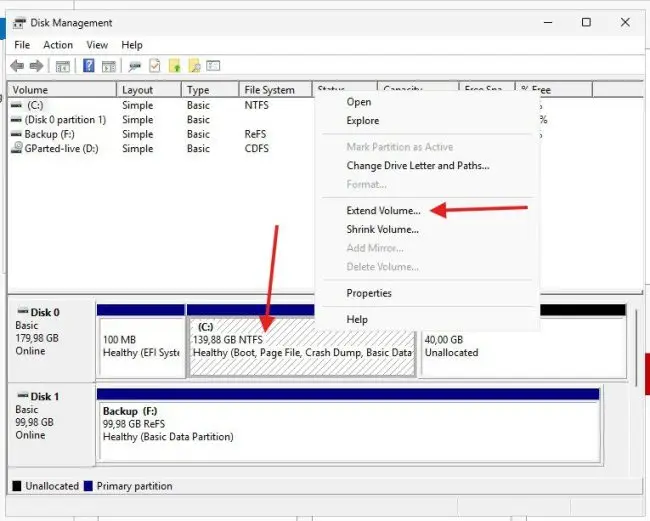
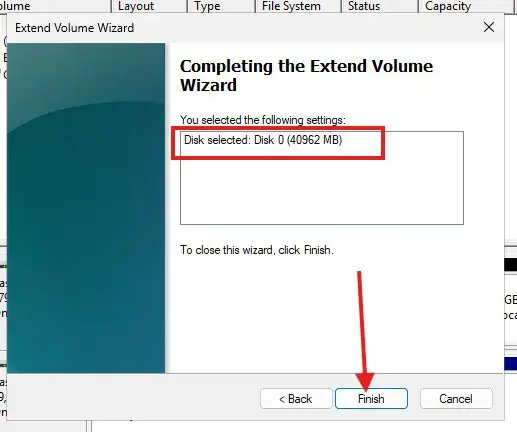
Once Windows boots again, use Disk Management to remove E: if it is no longer needed. Confirm the volume deletion only after checking that it contains no data you need. With the space unallocated and adjacent to C:, right-click C: and run Extend Volume. Follow the wizard and finish the operation.
Enable WinRE and check the result
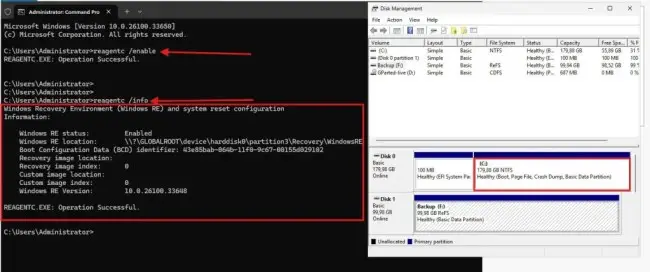
After extending C:, re-enable the Windows Recovery Environment and confirm its status from an administrative Command Prompt:
reagentc /enable
reagentc /info
In this example, reagentc /enable registered WinRE on partition 3, the C: drive, without a separate Recovery partition. Check the reported status on your server before relying on recovery tools. Then confirm that C: has the required free capacity and resume the update or maintenance task that prompted the change.
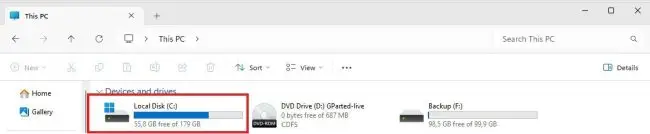
The key operational detail is the partition order. Extending a virtual disk adds capacity, but Windows can only extend C: into suitable adjacent unallocated space. Here, GParted removed the partition blocking that space, and Windows Disk Management completed the volume extension.